Thursday 31 October 2013

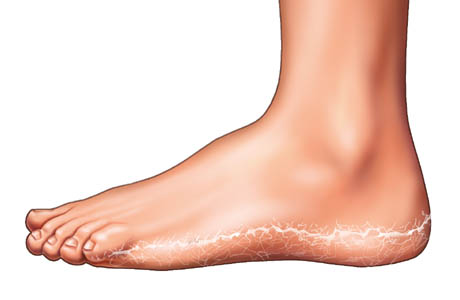
Do you have itchy rash on the arch or heel of your foot?

An itchy rash on the arch or heel of the foot is an extremely common problem to have.
  • Since the arch of your foot is very thin, it is a prime target for feeling itching and irritation.
  • The most common causes are eczema, dehydration of the skin, dermatitis due to irritation by a material (sock or shoe) and athlete’s foot (Tinea Pedis).
  Athlete’s foot is the most common cause:

  • These are usually very easily treated since the offending agent can be removed or corrected and the fungus easily treated compared to the more difficult nail fungus.

Itchy Foot Arch Rash Itchy Rash on the Arch or Heel of the Foot
Itchy rash on the arch or heel of the foot

Symptoms of an itchy foot arch rash:

  • Red or violet skin color.
  • Inflamed skin.
  • Blisters if very severe (Assume acute fungal infection or athlete’s foot).
  • Flaky dry skin (assume chronic fungal infection).
  • Peeling skin.
  • Bleeding and scarring from scratching.

 Itchy Rash on the Arch or Heel of the Foot
Strongly consider athlete’s foot or foot fungus if you have dry & flaky skin as in this distribution.

Prevention of itchy rash on the arch or heel:

The majority of causes of itchy foot arch rashes consist of irritations that should be removed by trying to remove different materials that may be irritating your feet such as the socks, shoes or detergents. The second major cause is due to dehydration which can be prevented by wearing thinner socks, moisturizing your feet after taking a bath or shower;  The third common cause is hygiene- simply washing and moisturizing may take care of it; the fourth major cause if fungal infection which will need an athlete’s foot medication to take care of the problem.
  • Allergies to a material.
  • Dehydration (low humidity and wet feet that need to be moisturized).
  • Overly sweaty feet due to bacteria (pomphylox which may need medication and moisturizing).
  • Overly sweaty feet due to heat (need better socks).
  • Insect, tick or flea bites.
  • Sock material irritation.
  • Shoe material irritation.
  • Soap, laundry detergent or perfume irritation.
  • Pregnant women hormones.
  • Poor foot hygiene.
  • Lack of moisturizing after bathing or showering.


Strongly consider foot fungus:

15% of the world has foot fungus. This causes chronically dry, itchy and flaky skin.

Symptoms of foot fungus:

  • **If constant dry skin in the foot: assume foot fungus!**
  • **If toenail fungus: assume you have, or have had foot fungus!**
  • Usually persistent dry skin means foot fungus!
  • Scaling, flaking and itching.
  • Pain, swelling and inflammation.
  • Blisters and cracking of the skin may occur.
  • Usually in the sole of the foot and not on top of the foot.
  • Can be in between the toes in the web-spaces.

 Itchy Rash on the Arch or Heel of the Foot
Constantly dry and itchy skin is a sure sign of foot fungus. Even if it has been present for numerous years!

Who is at risk for infection?

  • 15% of the USA population is estimated to have foot fungus.
  • Fungus reproduces through spores, which are very difficult to eradicate & they grow when conditions are ripe!
  • Fungus thrives in moist areas such as showers or pools.
  • It requires a warm moist environment to grow such as socks or inside a shoe.
  • Some people have a genetic variation that decreases their body’s ability to eradicate the fungus.
  • People with toenail fungus are more susceptible to foot fungus.


Home treatment of an itchy foot arch and heel rash

First you should identify what the cause of your athlete’s foot is which may be an involved process, but try the above prevention first.

Stage 1: Remove the cause of the problem.

 Itchy Rash on the Arch or Heel of the Foot
Moisturize your skin after taking a shower or bath. Water dehydrates your skin and is a very common cause of eczema!

  • Wash feet your feet with soap regularly.
  • Moisturize with any moisturizing cream after your feet get wet (this prevents dehydration) every time for 2 weeks!
  • Change the material of your socks or any other material that may be irritating your feet (perfume etc)

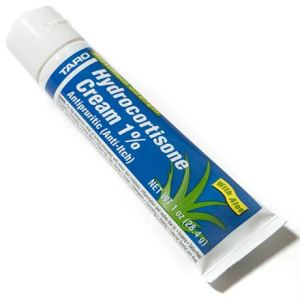
Stage 2: Try an over the counter cortisone cream or antihistamine medication.

 Itchy Rash on the Arch or Heel of the Foot
If it is not foot fungus, then it can be an allergy or irritation. Hydrocortisone cream will decrease the inflammation. But if it gets worse, stop using it and assume fungus!
  • Consult with your doctor and pharmacist, but 2/3rds of itchy rashes will be taken care of with a week or so of over the counter cortisone cream.
  • If this works you likely had eczema or dermatitis.
  • If the rash does not get better move on to step 3.

Stage 3: If that fails, assume fungus!

  • If the rash got worse with the cortisone cream or antihistamines, it is likely athlete’s foot or a fungus.
  • At this point you should go see your podiatrist for some foot medication.
  • 2 weeks of medication will take care of almost any athletes foot with 100% certainty.

Stage 4: Also treat toenail fungus if present.

Toenail Fungus Can Re-infect Your Skin!
  • When treating your foot fungus, you should treat your toenail fungus as well!
  • Foot fungus can lead to toenail fungus.
  • But toenail fungus can also lead to foot fungus.
  • People who treat their foot fungus but continue to have toenail fungus will just re-infect themselves.

Jump to the toenail fungus treatment guide!


For more information about itchy rash on the arch or heel visit this link!
and   For info on itchy skin follow this link!

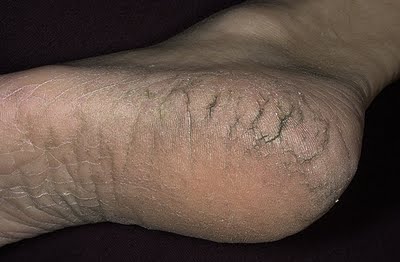
Do you have dry cracked feet?

Dry Cracked Feet – stop getting annoyed by itchiness, flaking and irritated skin. Find out what’s causing it and start treating it!
 Dry Cracked Feet

Why do we get dry cracked feet?

Usually if the the skin is severely dry an cracked as seen in the picture, something is causing it.
  • The skin on the bottom of our soles is special because it is thicker than the rest of the skin in our body.
  • It also relies more on sweat glands rather than oil glands to keep moist, so it is more important to keep it moisturized.
  • It is important to keep the bottom of the feet moisturized, it is the ultimate cure for any cause!
This thick skin is more susceptible to dehydration to to lack of moisturizing; it is also more prone to inflammatory reactions and fungal irritation.

Dry cracked feet symptoms:

If the dry, cracked feet are very severe, then something else can be causing it. The symptoms will range from the following:
  • Itchy skin.
  • Red skin.
  • Cracks in the skin.
  • Bleeding may be associated with the cracks.
  • Peeling at the bottom of the foot and heel.
  • Flakes and flaking.
  • Rough, uneven skin.
  • Development of a rash.
  • Worse after showering or bathing.

 Dry Cracked Feet

Dry cracked feet causes:

  • Showering or bathing.
  • Inflammatory skin conditions: exczema, psoriasis and many more.
  • Contact dermatitis (irritation by a harsh substance- such us a lower quality soap, or chlorine).
  • Cold weather (causing dehydration).
  • Low humidity in your home (causing dehydration).
  • Older Age (less blood supply)
  • Peripheral vascular disease.
  • Smoking.
  • Diabetes.

dryskin Dry Cracked Feet

Home treatment guide and suggestions:

Follow this treatment protocol to fix your dry cracked feet!

1) Assume skin irritation.

Assume initially it is dryness, dehydration or an inflammatory condition.
  • 2/3rds are caused by inflammatory causes: eczema, skin conditions, irritation, dehydration, sweating disorders.
  • **Inflammatory Conditions are all treated the same way, but different than fungal conditions**.
  • For best results always go see your podiatrist or dermatologist!

The skin irritation  treatment guide!


2) Consider athlete’s foot:

If part 1 does not cause your foot to get better after a week, it may be a fungal infection.

  • 1/3rd are caused by Fungal Irritation.
  • **Fungal conditions are all essentially treated the same way, but different than inflammatory conditions**.
  • For best results always go see your podiatrist or dermatologist!

The complete foot fungus treatment guide!


The way I would treat this if it was myself:

  • 1)Assume inflammatory causes and start treating it that way.
  • 2)If it doesn’t start getting better after a week or so, it is most likely fungal irritation.
  • 3) Go see your podiatrist since something more complicated may be going on.

To exercise you need your feet healthy so check this link for more information about your dry cracked feet!

Friday 11 October 2013

How to treat foot fungus with home cures?

* Foot fungus home cures: new skin takes approximately 30 days to grow out, these cures make sure the new skin is fungus free!

What is foot fungus?

Foot fungus is a superficial infection on the skin of the foot:
  • Millions of people in the USA and even more around the world have it!
  • It is a very common infection to have.
  • Most people get it in moist areas such as pools and showers.
  • This can lead to dry skin, flaking, itching and pain.
  • In fact it should be assumed that most constantly dry and thick foot skin is due to foot fungus!
  • Foot fungus can also present as thick fungal nails.

 To learn more about foot fungus - click here!


 Foot fungus home cures:

There is not a great deal of medical studies available for  home remedies because there is no one to fund them!
  • But studies show that skin fungus is very superficial and easy to cure.
  • Most of the following home remedies have been shown to have a consensus success rate by patients!

1) Apple vinegar soak treatment:

 Pros:
  • + Easy to use method.
  • +Very cheap and readily available at home.
  • + 85% success rate.
Cons:
  • - Can irritate the skin in some people.
acv Foot Fungus Home Cures
Success rate can be 85%+ after 4 weeks of use!
Why Does It Work?
  • A Michigan State University (MSU) study shows that Vinegar has anti-fungal properties.
  • This study focused on fungal toenails, but skin fungus is much more superficial and easier to treat than toenail fungus.
  • Apple Cider Vinegar provides a inhospitable acidic environment for the fungus.
  • It is a fungicidal chemical, this means that it kills the fungus rather than just preventing its growth.
  • It is very common to hear people say they feel immediately better after using this just for a short time!

Success Rate:
  • Skin takes approximately 30 days to progress from the stem cells to the superficial skin.
  • For this reason treatment must be approximately 30 days in length.
  • Studies have shown that if only 2 weeks of treatment are performed, cure is achieved 20%. If 4-6 weeks of treatment are maintained, then cure rate is about 65-85%
  • If you still have skin fungus after 4-6 weeks, you may have something and should go see your physician!

14 beer foot bath Foot Fungus Home Cures
Soak for just 10 minutes or so a day, but if your skin is irritated: Stop or take breaks!

Instructions:
  1. Pour some apple vinegar or some white vinegar (either is fine) into a tub of warm water.
  2. The mixture can be  1/3 or less  if your skin becomes irritated.
  3. Normally use about 1/2 to 1 cup of vinegar and dilute it with water. Then soak!
  4. If the skin becomes irritated, then slow the treatment down; do it every second or third day instead of every day.
  5. The skin needs about 4 weeks worth of treatment to get better, but if the fungus comes back, just do this again!
  6. Put lemon or orange peels into the vinegar while you are storing it within the fridge, this will help eliminate the vinegar smell.

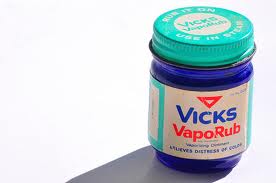
 2) Vick’s vapor rub treatment:

 Pros:
  • + Easy to use method.
  • +Very cheap and readily available at home.
  • + High success rate, but perhaps not as potent as vinegar.
  • +Less caustic(harmful) to the skin as vinegar.
Cons:
  • - It can get all over your sheets.
 Foot Fungus Home Cures
Vick’s VapoRub has been shown to have potent anti-fungal properties!

Why Does It Work?
  • A Spanish study indicates that the components of Vick’s Vapor rub are very anti-fungal.
  • The Mayo Clinic on the other hand states that more treatment studies are necessary.

Vick’s Vapor Rub contains ingredients which have been independently proven to have anti-fungal properties in studies.
  • Camphor (4.8%).
  • Thymol (1.2%).
  • Menthol (2.6%).

Success Rate:
  • Skin takes approximately 30 days to progress from the stem cells to the superficial skin.
  • For this reason treatment must be approximately 30 days in length.
  • Studies have shown that if only 2 weeks of treatment are performed, cure is achieved 20%. If 4-6 weeks of treatment are maintained, then cure rate is about 65-85%
  • If you still have skin fungus after 4-6 weeks, you may have something and should go see your physician!

Instructions:
  1. Rub a small amount onto the effected regions every night before you go to bed.
  2. The exact amount is not extremely important, do not go crazy with large amounts.
  3. Put some socks over it so it does not get onto your sheets.
  4. Remember to keep using it for at least 4 weeks!

C) Tea tree oil foot soak remedy:

Pros:
  • + Easy to use method.
  • + All Natural.
  • + Fairly cheap, <$10 per bottle .
  • + Also works on the toenails.
  • + 85% success rate if used correctly.
  • + Does not irritate the feet.
  • + Can be used as a topical or a foot soak.
1013015.large Foot Fungus Home Cures
Cons:
  • - Can irritate the skin in some people.
  • - Soaking feet can be annoying.
  • - Can smell, but ways to make it smell better.
  • - Careful if you are a diabetic.
  • - Careful if you have peripheral neuropathy.


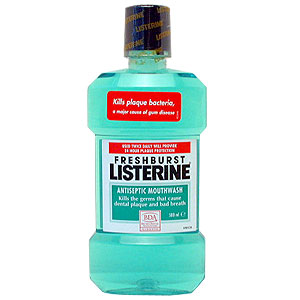
D) Listerine foot soak remedy:

 Foot Fungus Home Cures
Listerine does not have any specific medical trials proving its efficacy. Yet there is overwhelming evidence that its ingredients are anti-fungal.
Pros:
  • + Easy to use method.
  • + Double use for a readily available home product.
  • + Readily available in most homes.
  • + Also works on the toenails.
  • + Can be applied as a topical without having to soak.
  • + Very high success rate.
  • + Not very irritating to the skin.
  • + Based on medically proven ingredients.
  • + Nice smell.
Cons:
  • - May not be as potent as some of the other home remedies.
  • - Annoying to apply every night.
  • - Can become expensive.
  • - Costs about $10 for a 1.5 L jug of Listerine.
  • - No specific medical trials for using it.


3) Topical medications and powders!

Look I know I said this was a home remedy guide, but these things are cheap and effective!
  • Sprays and powders really are your best bet.
  • They are easy to put on & very cost effective.

 Foot Fungus Home Cures


Toenail fungus acts as a fungus reservoir:

The fungus under your toenails can come out and reinfect the skin and web spaces of your foot.
It is important to cure both the skin fungus and the toenail fungus!
bigstockphoto toenail fungus 6049466 Foot Fungus Home Cures

 If you have fungal  nails, they need to be treated as well!

Monday 26 August 2013

Do you suffer from toenail fungus (update)?

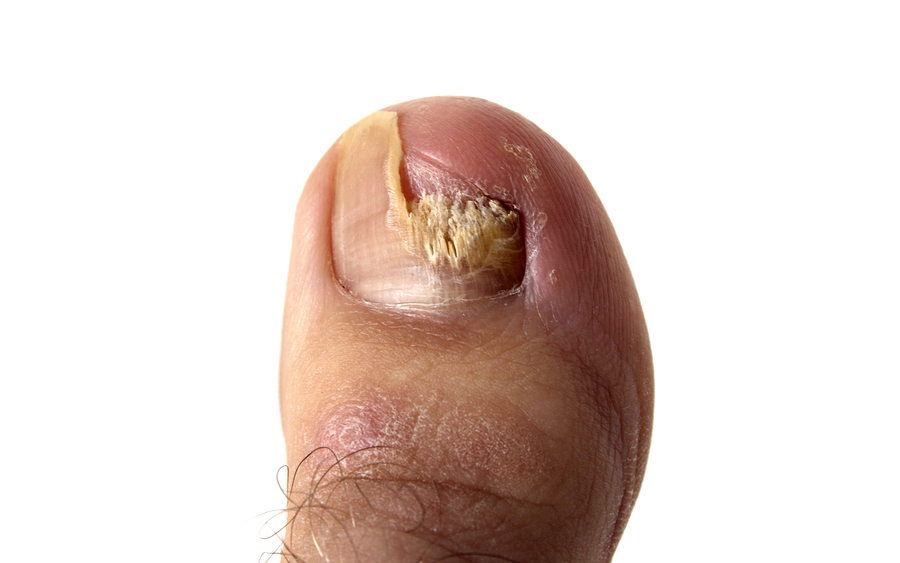
Advice from a Toenail Fungus Podiatrist: Yellow and thick toenails are usually note even caused by the fungus, but by the skin under the nail bed!
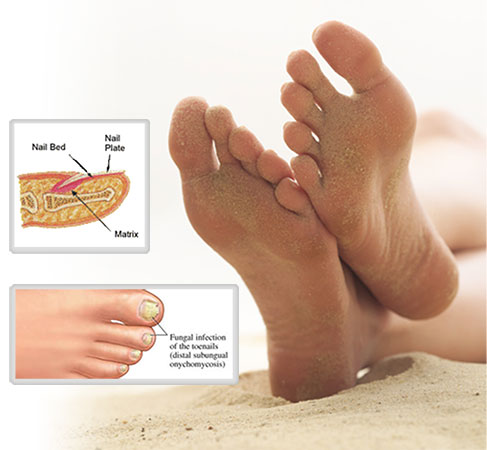
 Advice from a Toenail Fungus Podiatrist
Kill your toenail fungus infection

Causes of a severe toenail fungus infection?

Yellow and thick toenails are not always caused by a problem with the cells that are responsible for growing the nail. Yellow and thick nails are actually caused by what is happening in the nail bed!
Dr. Bradley Bakotic , THE leading foot dermatology-pathologist (backed by cutting edge publications),  states that the toenail itself is rarely even thickened. He states that it is the skin under the toenail becomes thick and spongy; it then causes the nail to lift and the callus makes the toenail appear yellow. The thick skin under the toenail is really what is making the nail look yellow and deformed!
Over time the nails lose their blood flow from the skin underneath them and become dry, brittle and detach from the skin underneath it. The nails lose their pink appearance because the blood vessels underneath the nail plate are no longer visible. This also means that the immune cells don’t have access to the area under the nail because they are blocked off by the spongy and thick tissue. This leaves the area ripe for fungal invasion.

fingernail03 Advice from a Toenail Fungus Podiatrist
A less pink nail bed makes the nail yellow, not the fungus!

Only now does fungus get under the toenail

Once this process begins to happen, it creates a space for fungus to enter underneath the nail. This is why nail fungus is so hard to cure! Toenail fungus is not really the cause of ugly nails, but an inevitable progression from the callus formation under the nail states Dr. Bakotic and recent literature. The fungus is not what is causing your nail to look bad. Your nail looking bad is what is allowing the fungus to get underneath it! My mind was absolutely blown the first time I heard this!


Ask yourself these questions before kill or remove the fungus:

It is a good idea to skim over these commonly encountered problems. Otherwise you could spend months and huge $$$ attempting to treat the wrong problem!

1) How to fix severe toenail fungus?

**No need to read this if you read the stuff above, but make sure to understand that the fungus is not the only thing to fix!**

Read this before attempting any home cure!
You must understand that the fungus is not what is causing your toenail fungus. If you attempt to treat only the fungus your nails will never look better! There is something predisposing you to being able to catch the nail fungus. Read point #2 to find out why you are susceptible and if it is even worth pursuing a cure.

2)Who is most susceptible to toenail fungus

First there must be some type of trauma causing

Systemic Factors
  • Old Age.
  • Immunosuppression.
  • Poor peripheral circulation.
  • Nail psoriasis.
  • Onychomycosis susceptibility genetics (very rare).
Agent Factors
  • Exotic non-responsive organisms (<10%)
  • This is very unlikely
Environmental Factors
  • Occupational factors- excessive sweat
  • Occlusive footwear
  • Prolonged contact with water or sugary food

3) Is toenail fungus contagious?

Toenail fungus is not contagious unless you are susceptible to it. There is fungus everywhere, but not everyone gets it. It is only usually systemically compromised people. The people listed in #2  are more contagious and susceptible for toenail fungus because of their systemic problems. You also need to be experiencing some microtrauma and irritation; this allows the fungus a route to get under the nail.

4) Does nail polish cause toenail fungus?

It is very common to remove your nail polish and see white chalky nails. But don’t panic, it is probably not nail fungus! This is a condition known as keratin granulations almost all of the time; unless you are already susceptible for fungus and the nail polish was just masking it. There is still a chance it may be a type of nail fungus called white superficial onychomycosis; if you are worried go see your toenail fungus podiatrist because running a lab test is the only way to know for sure.

5) Black toenail fungus?

If you have black toenail fungus, then this is likely not even toenail fungus. If you suspect black toenail fungus then look at these options first:


What should you use to clear and eliminate your toenail fungus:

Should you try a  Natural Home Cure? Or go straight to the podiatrist for heavy duty treatment? If you meet the criteria for option number 1 – you should try using home, natural or topical treatment first. There is no guarantee that it will work, but there is no harm in trying it out. Going to a good toenail fungus podiatrist will  boost your chances from about 0% in severe toenail fungus to above 90% according to published medical studies.

1) Natural, Homeopathic Home Remedies or Topical Creams:

The home remedies and topical creams are not very effective on their own. They normally work under 40% when the conditions are right. If the conditions are not right, then there is virtually a 0% chance of them working. This does not mean that they are bad, you can combine for greater effect with strategies I will show you. There is also no harm in trying the easy solution first and seeing what happens. So see if you qualify for these home remedies:

Use Home Treatment or Over The Counter Medication if:
  • Area of nail involvement is under 50% of the total nail surface.
  • There is no ingrowing of the nails into the skin edges.
  • The nail is not painful.
  • The skin under and around the nail still looks normal and has not yet become thick.
  • No White, yellow, orange, brown streaks in the nail exist.

2) Go see your toenail fungus podiatrist:

**Unfortunately if your nail is over 50% involved, it will be very difficult (but still possible) to cure your nail fungus at home**
A toenail fungus podiatrist can provide you with many services such as evaluating why you are predisposed to toenail fungus in the first place. They can correct these problems and make sure you are not susceptible for further toenail fungus. They can also place you on systemic medications, which when combined with dremeling and topical medications can produce an 90%+ cure rate.
You need a Podiatrist if:
  • If you have trouble walking or have toe pain.
  • If you have never been evaluated for why you have space under your toenail.
  • If this is all very overwhelming to you.
  • If all toenails are 100% involved, thick or crumbling.
  • Immunosuppression (Diabetes, Rheumatoid arthritis or any systemic disease).
  • Diminished peripheral circulation (Peripheral vascular disease, smoking, high blood pressure or more).
  • Poor nail growth (nail has detached before, loose edges).
  • If you are over 65 years of age.
  • If you are a child under 18 years of age.

How to get cured: the home treatment review guide

Note #1: Be careful using any of these methods at home- this guide is for educational use only and should never be attempted without a toenail fungus podiatrist for supervision.
Note #2: Remember that any home treatment or topical medication will only give you a 40% cure rate. And that is if you qualify for home treatment. Home Treatment or Over the Counter Medications will not work if you have any of the following:
  • >50% nail involvement.
  • An entire hand or foot involved.
  • Any systemic abnormalities that will depress your immune system: Smoking, PVD, Diabetes etc.
  • Any of the criteria listed above.
Note #3: If you still want to try these- your toenail fungus won’t get any worse. It may even be advised that these be combined with the more advanced systemic medications. Check with your toenail fungus podiatrist.

Home treatment reviews (in progress- check back again!)

Before you get started, get one of the following tools:
  • Emery Board.
  • Nail File.
  • Pumice Stone

Thinning your nails makes treatment 25%+ more effective!

Studies show that using an emery board to file your nails down in thickness increase the effectiveness of all of the following treatments by 15-25%. This is especially impressive when they only had a 40% chance of working in the first place!

A thick layer of fungal biofilm needs to be removed to allow treatment penetration.

The toenail fungus can create a thick impenetrable layer of biofilm that prevents treatment agents from entering into the nail bed. This lack of penetration under the nail plate is the #1 cause of treatment failure!
Research states that as you thin down your nails with an emery board or a pumice stone as described in treatment, you gain a 15-25% increased chance of the following treatments in working for you. So trim and thin your nails before the following treatments are tried!

A)Vick’s vapor rub treatment

  • A Spanish study states that Vick’s Vapor rub is very effective.
  • The Mayo Clinic states that while many people vouch for this treatment method, it is difficult to prove that the Vick’s Vapor Rub is effective.
Vick’s Vapor Rub contains ingredients which have been independently proven to have anti-fungal properties in studies.
  • Camphor (4.8%).
  • Thymol (1.2%).
  • Menthol (2.6%).
What to do:
  1. For this to work, you must fix whatever is allowing you to be infected with toenail fungus in the 1st place.
  2. Rub it onto your nail every night before you go to bed.
  3. Put some socks over it so it does not get onto your sheets.
  4. It is essential that you do this for at least 6 weeks to 3 months to eradicate the fungus from your nails.
  5. The nails then need 6-9 months to grow out.

B)Apple cider vinegar soak treatment

  • A Michigan State University (MSU) study shows that Vinegar has anti-fungal properties.
  • The MSU study has specifically to reduce nail fungus symptoms and even cure the fungus, but it was in very superficial fungus in completely healthy people.
  • Apple Cider Vinegar provides a inhospitable acidic environment for the fungus. It is common to hear stories about how pouring just a little bit on foot skin fungus has made people almost instantaneously better!
What to do:
  1. Pour some apple vinegar or some white vinegar (either is fine) into a tub of warm water.
  2. The mixture can be 50/50 or 33/66 if your skin becomes irritated.
  3. If the skin becomes irritated, then slow the treatment down; do it every second day instead of every day.
  4. It is essential that you do this for at least 6 weeks to 3 months to eradicate the fungus from your nails.
  5. The nails then need 6-9 months to grow out.
  6. Put lemon or orange peels into the vinegar while you are storing it within the fridge, this will help eliminate the vinegar smell.


C) Listerine treatment

There is much less research behind using Listerine for toenail fungus. But like vick’s vapor rub, there is a good amount of testimonials stating it works, and the ingredients are anti-fungal. Thus there has to be something behind it.
Listerine contains the ingredients which have been independently proven to have anti-fungal properties in studies.
  • Camphor.
  • Thymol.
  • Menthol.
What to do:
  • The goal is to rub it onto your nail every night before you go to bed for six weeks.
  • Pour some Listerine into a tub of warm water.
  • The mixture can be 50/50 or 33/66 if your skin becomes irritated.
  • If skin is irritated do it every second day instead of every day.
  • It is essential that you do this for at least 6 weeks to 3 months to eradicate the fungus from your nails.
  • The nails then need 6-9 months to grow out.

Prevent toenail fungus from coming back!

It is amazing how difficult it is to treat your fungal nails, but then people jump right back into the situations that caused it in the first place. It is essential that you start to control your sweating, correct your footwear (and throw out the disgusting gym shoes!), use anti-sweat powders and use lysol to spray down your old shoes.

The prevent toenail fungus from coming back guide 


For more information and updates about treatment of toenail fungus see this link.

Do you have foot warts (Verruca)?

A foot wart, verruca or plantar wart is no different than a wart on any other part of the body. These warts eventually go away by themselves, but they are potentially contagious and could stay around for a couple years; treatment is usually recommended to decrease the length of pain, the duration of pain and to decrease the chance of transferring it to other parts of the body.Foot Wart 300x225 Foot Wart Verruca Pain

Cause of a foot wart or verruca

  • HPV (Human Papilloma Virus) is the cause of warts.
  • The virus can stay alive for many weeks without a host ,especially in the shower!
  • The wart enters through microscopic cracks in the skin of the foot or the fingers.
  • If a cluster of warts forms, it is called a Mosaic wart which can create extremely large surface areas.
  • It is completely normal to get a wart – most warts occur in 12-16 year old children, but are very rare in older age.

Symptoms of a  foot wart or verruca

  • Not usually painful although may be tender when pressed, especially from the sides.
  • The verruca may feel like a small stone under the foot.
  • It looks different from a callus because of little red pin like dots- a callus looks like normal but thicker skin.
  • There is usually a callus that forms around the wart.

Diagnosis of a foot wart or verruca

  • Verrucas vary in size from a 1mm to over 1 cm and may vary in shape too.
  • The surface of the verruca is usually covered with small black dots (blood vessels).
  • They are usually surrounded by hard skin.
  • There is usually nothing ever really tricky about diagnosing a wart.
  • If the wart is really large then it is a more resistant mosaic wart that needs more attention.

Prevention of a foot wart or verruca

  • Warts and verrucas are very common and nothing to get worked up about (especially ages 12-16 years old), although they should be treated as they are mildly contagious.
  • They are only passed on via direct skin to skin contact and can be passed to other people or to other areas of your body (although this is more common when warts appear on the fingers).
  • There is a higher risk of passing a verruca  if the skin is damaged or wet.
  • Swimming pools are common infection area for verrucas.
  • To avoid passing on a verruca, make sure it is covered when you go swimming (either buy a waterproof plaster, duct tape or special verruca sock), wear flip flops when walking barefoot and in the shower and don’t share towels.

Home treatment of a foot wart or verruca

There are many available treatment methods without a clear winner, because even doing nothing after a little while will make the wart go away! Studies show that you can make them go away a little bit faster and some of the best treatments achieve 70-90% cure rates within a couple weeks. If you have a mosaic wart then the chemical treatment approaches are recommended.

1st line therapy of a foot wart or verruca

- Duct Tape is my favorite method to try first!

A) Duct tape treatment

This is a controversial treatment method, some scientific literature states that it works great and it can resolve the majority of warts over a couple weeks, but then other papers say it does not work at all. I say whats the harm in trying it! This method has always worked for me, and if it didn’t work in the future- you can always move on to the other treatments!

B) Apple cider vinegar treatment

- Theoretically this should work, there will be some pain! Compare this to the duct tape method which is slower, safer and has no pain.

C) Salicylic acid

- This medication is known as a keratolytic agent which works by “loosening” the surface of the wart. Use this medication as directed by your pharmacist or your podiatrist.

2nd line therapy

- All of these have shown to be effective, but it is unclear which is the best (which means none of them are clearly better than any other). Canthardin and Cryosurgery are the most commonly used in podiatrist offices.
- Canthardin- This is a more painful but more effective agent than salicylic avid. It causes a blister to form within a day or so of application to your blister.
- Cryosurgery- The wart is touched by a liquid nitrogen swab. This freezes the cells of the wart destroying the tissue and stimulating new tissue to come up behind it. This sounds a lot more intense then it really is!
- Immunotherapy- This is a fairly new treatment that involves injecting something (any dead foreign particles that are not dangerous) that irritate your immune system to attack this area. As a “coincidence” the immune system cells wipe out the HPV virus that is causing the wart.

3rd line therapy

- The most common method is to cut the wart out and then use electricity to singe the underlying tissue under anesthesia.
- If the wart is extremely resistant consult a podiatrist about invasive treatment. These treatments are usually reserved for warts that have survived the first and second lines of treatment.
- Surgery- This can be done inside the office if the foot is not massive, but if it is a large mosaic wart- then the OR is usually necessary. The foot is numbed with anesthetic, then then the wart is simply cut out down to bleeding. The tissue is then heated to close it up; don’t worry, you won’t see whats happening! The wart can be considered as good as gone at this point and while there will be a scar, it should not be something that ever bothers you.
- Electrocautery- this is combined with surgery to burn the area where the wart used to be.
- Laser Surgery- It is a choice, but from what I have heard and seen it is more expensive than practical.

To learn more about foot warts visit this link.

Thursday 22 August 2013

Do you experience allergic reactions (dermatitis) on your feet?

There are two types of dermatitis caused by substances coming in contact with the skin: primary irritant dermatitis and allergic contact dermatitis. The primary irritant dermatitis is due to a non-allergic reaction of the skin resulting from exposure to an irritating substance. Allergic contact dermatitis is the allergic sensitization to various substances.
Primary irritant Dermatitis
People who work in areas where their feet are exposed to repeated or prolonged contact to chemicals, oils, or wet cement can develop primary irritant dermatitis. There are certain solutions that people soak their feet in as home remedies. Some of these solutions are safe if used properly, but their improper use can cause a significant contact dermatitis. This can result in skin break down and infection. This is particularly dangerous in people with diabetes; the result can be devastating and limb threatening. A common misconception is the value of soaking in hot water. Some people believe that the hotter the water the better. Quite to the contrary, hot water can cause damage to the skin and result in first or second-degree burns. People will soak their feet in all sorts of solutions. Common solutions are bleach, vinegar, salt water and iodine-based solutions such as betadine. If used properly and under the guidance of a doctor, these solutions can be beneficial. A common mistake that is made is to create solutions that are too strong. Should this occur, irritation to the skin and the development of a rash can develop. The dermatitis that results can also become secondarily infected.

Allergic contact Dermatitis
Allergic contact dermatitis is the result of exposure to substances that sensitize the skin, so that each time one becomes exposed to it again, an inflammatory reaction will occur. Some people are allergic to the substances in the dyes of socks or the materials used to make shoes. The rash that develops is in a pattern that reflects the exposure to the substance. Adhesive tapes can cause an allergic reaction with blisters or a rash developing beneath the tape. Not all blistering or rashes from tape on the feet however are an allergic reaction. Because of the heat and the accumulation of moisture beneath the tape an acute athlete’s foot infection may occur.

Treatment
Treatment should be directed at the cause of the dermatitis. Burns should not be treated with ointments because ointments are too occlusive and can trap the heat in the burned tissues resulting in further tissue damage. Cool compresses are soothing and can limit the damage caused by the burn. The dermatitis caused by the soaking of the feet in concentrated solutions act like chemical burns and cool compresses are also useful in this instance. Dermatitis caused by an allergic reaction will respond well to topical steroid compounds like hydrocortisone cream. Steroid creams should not be used unless you are certain that the condition is caused by an allergy. Cortisone creams will mask infection and allow infections to get worse while reducing the normal inflammatory reaction associated with infections. Anti-fungal creams are useful in the treatment of athlete’s foot that may be caused by occlusion under adhesive tape.

To learn more about thi9s conditions visit this link!

Thursday 18 July 2013

Psoriasis under the toenails

Psoriasis under the toenails can result in severe thickening, discoloration and pitting of the toenails. Learn how to make your toenails better!

arth7 psoriasis Psoriasis Under The Toenails
Psoriasis under the toenails and fingernails

Causes of psoriasis under the toenails

The cause of toenail psoriasis is unknown. What we do know is that a good percentage of people suffering from psoriasis also develop nail problems as well. The reports vary with some saying only about 10-15% suffer from them, but other studies claim much higher numbers. The average seems to be around the 25% range.
You are more likely to have psoriasis under your toenails if:

Symptoms of psoriasis under the toenails:

Toenail psoriasis displays the following symptoms:
  • A discoloration beneath the nail. It is described as an “oil spot”.
  • The nail is much more thick.
  • The nail is extremely rough.
  • The nail displays characteristic pitting.
  • The distal part of the nail appears abnormal.
  • Beau’s lines – these are horizontal ridges.
  • Callus formation under the nail.
  • Loosening of the nail.

Diagnosis of psoriasis under the toenails:

The toenails are graded by a system known as the Nail Psoriasis Severity Index (NAPSI). It is a numerical and reproducible system for monitoring the toenail psoriasis. The system is based on assigning numerical values for some of the symptoms listed above.

Home treatment for psoriasis under the toenails:

Some Quick Tips for Home Care:
  • Keep your nails short and smooth. They are susceptible to bacterial and fungal infections which could make them look much worse.
  • Wear gloves to protect your nails while you are performing activities to keep your nails protected.
  • Wear properly fitted shoes to avoid excess pressure on your nails. Even light irritation and inflammation can make things worse.
  • Make sure to dry your nails properly after bathing.
  • Nail psoriasis is hard to treat, as nails grow very slowly. Be careful with them! They only grow 1mm per month.
  • You can try topical steroid cream temporarily to improve nail appearance.
  • Taking Vitamin D Vitamins may help.
  • Moisturizing ointments at night before bed work well.
  • Soak nails in vegetable oil while watching TV. You can then use an emery board or nail file to take the nails down a little bit.
  • Synthetic nail hardeners can make the nails look much better. These are glossy covers, no one will know the difference!
  • Acrylic nails are dangerous because you are more susceptible for nail fungus already with your psoriasis- I don’t recommend these.
  • Salicylic ointment can work great for your psoriatic nails. Follow directions of your prescriptions.
  • A mutlivitamin- while not completely proven through medical trials, has been recommended by many specialists.

Podiatrist treatment

There are many advances that are occuring in this field, so get excited! The outlook for psoriasis, while still dim is looking better and better every year.
Treatments focus on managing symptoms with a rheumatologist. Individualized plans can included topical and intralesional creams and injections. You can combine these with systemic and combination oral medication therapies.

Check this link for more information about psoriasis under the toenails.

Do you suffer from plantar fibroma?

Plantar Fibroma: It presents as a hard lump or nodule under the skin in the arch of your foot. Learn how to handle it easily and permanently!

PlantFibroma2final Plantar Fibroma
Photo Credit: Shenandoah Podiatry

What is a plantar fibroma?

A plantar fibroma is a relatively non-dangerous condition; but it can become extremely painful. A plantar fibroma is the development of what feels like a “pebble” of connective tissue. It could even feel like a much larger thickening of the cords at the bottom of your foot.
These nodules are extremely slow growing. It could take months to years before they even begin to irritate you. They eventually lead to more and more irritation. Eventually causing your toes to bend and stiffen because you adapt your biomechanics and walk improperly.

Plantar fibroma symptoms:

  • Usually on the inside bottom of the foot, near the highest point of the arch.
  • The lump itself is usually pretty painless.
  • Only the pressure of the floor creates pain.
  • Only 1/4 people show it in both feet.

Plantar fibroma risk factors:

  • Family history.
  • Associated lumps in hands as well.
  • Associated with Ledderhose disease: Nodules in the hand.
  • Associated with Peyronie’s disease:  Nodules on penis shaft.
  • Diabetes Mellitus.

fibroma Plantar Fibroma

Plantar fibroma treatment:

Treatment of the plantar fibroma depends on whether your goal is to make the pain go away, or to focus on making it disappear. The unfortunate news is that usually invasive means are the only way to make it go away permanently.

1) If the nodule is small:

Treat this like plantar fasciitis to see if the symptoms get better, we have developed a 4 stage guide that will take you through the complete treatment of bottom of the foot pain. Use this only if the nodule is small!
Non-invasive options:
  • Anti-inflammatory medication.
  • Accommodative orthoses.
  • Offloading padding.
  • Physical therapy.
  • Massage techniques.
  • Corticosteroid shots can relieve the pain

Plantar fibroma four stage treatment guide.


2) If the nodule is large:

These techniques should be reserved for the end stage of this disease. The consequences of surgery must be balanced; while the fibroma is gone, worse problems may develop.
  • Corticosteroid shots can relieve the pain.
  • Surgical resection of the plantar fibroma. This is a very rough option, as a part of your plantar fascia would need to be removed to permanently get rid of it. This may eventually impact your biomechanices and lead to flat foot.

For more information about plantar fibroma and its treatments visit this link.

Sunday 7 July 2013

Do you have foot wart (verruca) pain?

A foot wart, verruca or plantar wart is no different than a wart on any other part of the body. These warts eventually go away by themselves, but they are potentially contagious and could stay around for a couple years; treatment is usually recommended to decrease the length of pain, the duration of pain and to decrease the chance of transferring it to other parts of the body.

Foot Wart 300x225 Foot Wart Verruca Pain
 

Cause of a foot wart or verruca

  • HPV (Human Papilloma Virus) is the cause of warts.
  • The virus can stay alive for many weeks without a host ,especially in the shower!
  • The wart enters through microscopic cracks in the skin of the foot or the fingers.
  • If a cluster of warts forms, it is called a Mosaic wart which can create extremely large surface areas.
  • It is completely normal to get a wart – most warts occur in 12-16 year old children, but are very rare in older age.

Symptoms of a foot wart or verruca

  • Not usually painful although may be tender when pressed, especially from the sides.
  • The verruca may feel like a small stone under the foot.
  • It looks different from a callus because of little red pin like dots- a callus looks like normal but thicker skin.
  • There is usually a callus that forms around the wart.

Diagnosis of a foot wart or verruca

  • Verrucas vary in size from a 1mm to over 1 cm and may vary in shape too.
  • The surface of the verruca is usually covered with small black dots (blood vessels).
  • They are usually surrounded by hard skin.
  • There is usually nothing ever really tricky about diagnosing a wart.
  • If the wart is really large then it is a more resistant mosaic wart that needs more attention.

Prevention of a foot wart or verruca

  • Warts and verrucas are very common and nothing to get worked up about (especially ages 12-16 years old), although they should be treated as they are mildly contagious.
  • They are only passed on via direct skin to skin contact and can be passed to other people or to other areas of your body (although this is more common when warts appear on the fingers).
  • There is a higher risk of passing a verruca  if the skin is damaged or wet.
  • Swimming pools are common infection area for verrucas.
  • To avoid passing on a verruca, make sure it is covered when you go swimming (either buy a waterproof plaster, duct tape or special verruca sock), wear flip flops when walking barefoot and in the shower and don’t share towels.

Home treatment of a foot wart or verruca

There are many available treatment methods without a clear winner, because even doing nothing after a little while will make the wart go away! Studies show that you can make them go away a little bit faster and some of the best treatments achieve 70-90% cure rates within a couple weeks. If you have a mosaic wart then the chemical treatment approaches are recommended.

1st line therapy of a foot wart or verruca

- Duct tape is my favorite method to try first!

A) Duct tape treatment

This is a controversial treatment method, some scientific literature states that it works great and it can resolve the majority of warts over a couple weeks, but then other papers say it does not work at all. I say whats the harm in trying it! This method has always worked for me, and if it didn’t work in the future- you can always move on to the other treatments!

B) Apple cider vinegar treatment

- Theoretically this should work, there will be some pain! Compare this to the duct tape method which is slower, safer and has no pain.

C) Salicylic acid

- This medication is known as a keratolytic agent which works by “loosening” the surface of the wart. Use this medication as directed by your pharmacist or your podiatrist.

2nd line therapy

- All of these have shown to be effective, but it is unclear which is the best (which means none of them are clearly better than any other). Canthardin and Cryosurgery are the most commonly used in podiatrist offices.
- Canthardin- This is a more painful but more effective agent than salicylic avid. It causes a blister to form within a day or so of application to your blister.
- Cryosurgery- The wart is touched by a liquid nitrogen swab. This freezes the cells of the wart destroying the tissue and stimulating new tissue to come up behind it. This sounds a lot more intense then it really is!
- Immunotherapy- This is a fairly new treatment that involves injecting something (any dead foreign particles that are not dangerous) that irritate your immune system to attack this area. As a “coincidence” the immune system cells wipe out the HPV virus that is causing the wart.

3rd line therapy

- The most common method is to cut the wart out and then use electricity to singe the underlying tissue under anesthesia.
- If the wart is extremely resistant consult a podiatrist about invasive treatment. These treatments are usually reserved for warts that have survived the first and second lines of treatment.
- Surgery- This can be done inside the office if the foot is not massive, but if it is a large mosaic wart- then the OR is usually necessary. The foot is numbed with anesthetic, then then the wart is simply cut out down to bleeding. The tissue is then heated to close it up; don’t worry, you won’t see whats happening! The wart can be considered as good as gone at this point and while there will be a scar, it should not be something that ever bothers you.
- Electrocautery- this is combined with surgery to burn the area where the wart used to be.
- Laser Surgery- It is a choice, but from what I have heard and seen it is more expensive than practical.

For more information about foot wart or verruca visit this link.

Friday 5 July 2013

Do you suffer from painful and sore blisters on foot and toe?

Painful and Sore Blisters on the Foot and Toe should be offloaded to reduce damage and pain.  Focus on relieving shear pressure and decreasing friction!
Painful blisters on the foot and toe  are a common problem caused by friction from shoes or clothing which rubs repeatedly on the skin. Blisters usually do resolve by themselves if they are small and you stop putting stress on them, but if a blister is larger and has some obvious fluid buildup as seen above- then it might just be best to drain it so that more pressure doesn’t spread the blister. The following is a complete guide for treatment of itchy foot blisters, prevention and foot accessory advice.

Preventing sore foot blisters

  • Ensure that shoes fit correctly.
  • Protect the potential ‘hot spots’ by applying a second skin and / or taping. Click here for details of how to tape the foot.
  • If you wear boots such as those required for mountain walking ensure all seams are flat inside the boot.
  •  Take care of the boots, do not leave them on radiators or near heaters. This may cause the leather to shrink and seams protrude.
  • Keep feet as dry as possible. Wet shoes, boots and socks will cause blisters far quicker than dry ones.
  • Wherever possible change socks regularly and use foot powder to help keep them dry.

Taping for foot blisters


1 Painful and Sore Blisters on the Foot and Toe
Painful and sore blisters on the foot and toe

Running and painful foot blisters

Blisters are common among long distance runners. All of the above can be used to help prevent developing blisters, but there are a couple of extra points which may help:
  • Introduce new running shoes gradually.
  • Wear socks with a double layer. The second layer stops the first one from rubbing against the skin.
  • Try using petroleum jelly on areas prone to blisters. This helps the material glide over the skin, reducing friction.
  • Try using zinc oxide tape on blister prone areas to prevent friction on the skin.

What are blood blisters?

  • Blood blisters are those which appear red in color due to damage also occurring to a blood vessel, causing a bleed into the skin tissues.
  • They tend to occur more from a sudden impact or pinching of the skin, rather than a repetitive friction.
  • This type of blister should be treated in the same way as a normal blister, although be aware that due to the deeper damage, the skin underneath would be raw and usually very sore and more prone to infection.

Treatment of painful and sore blisters on the foot and toe

  • Most small blisters should be left alone and they will usually heal fine on their own.

At the first sign of painful and sore blisters on the foot and toe

  • The first sign of blisters will be redness over the skin, possibly at the back of the heel, the instep or toes.
  • Apply a second skin dressing or blister plaster and tape the affected area.
  • Ensure the feet are dry and change socks (unless you are in the middle of a race).
  • A highly effective but short term measure is cover the foot and affected area in petroleum jelly. This should provide instant relief from pain but as the heat from the foot melts the petroleum jelly it will run away and be ineffective.
  • When should you pop blisters?

For larger blisters or those which are causing problems, it may be necessary to pop them. Popping blisters should be done with caution, following these guidelines.
  • Make a small hole at the edge with a sterilized pin or needle, particularly if the blister is on a weight bearing surface. A pin can be sterilized by passing it through a flame.
  • Do not drain a blood filled blister.
  • Drain the fluid but leave as much of the skin as possible covering the wound. This is an important protective layer for the underlying skin and will help to prevent infected blisters.
  • Clean the blister with a sterilizing wipe.
  • Cover the wound with a second skin or blister plaster – take the time to apply it correctly.
  • For additional security apply tape over top.
How to get rid of painful and sore blisters on the foot and toe?
  • Blisters will usually just drain and heal on their own. Even if you have had to pop a blister, you should then simply clean the area, cover it to protect it and leave it to heal naturally.
  • If no pain, leave them alone!

To learn more about blisters visit this link. Good luck with your painful and sore blisters on the foot and toe!

Do you have heloma molle?

Heloma Molle – Another name for this is the foot corn, and it is experienced as a hard painful skin bump! Learn what it is and how to treat it!
AKA Foot Corn or Heloma Durum.
corns Heloma Molle

What is a heloma molle?

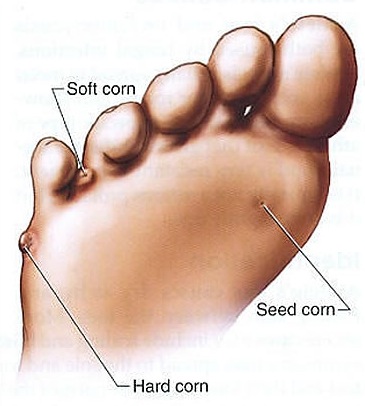
A heloma molle is a uniquely shaped callus that resembles a corn kernel. Because of it’s shape, the corn concentrates the pressure into a pinpoint area. This causes deep tissue pain and possible ulceration.

Heloma durum vs. heloma molle:

A heloma durum is a hard corn, while a heloma molle is a soft corn. This is usually just semantics as both are usually treated very similarly; except the durum may need to be softened slightly more ahead of time.

Diagnosis of a heloma molle:

  • Thick and hard skin.
  • Deep tissue pain.
  • Shaped like a corn kernel.
  • Pinpoint pressure rather than diffuse pressure.
  • Hurts when you push on it.
  • It does not have red dots like a wart.
  • Usually in the ball of the foot, base of the big toe or 5th toe.

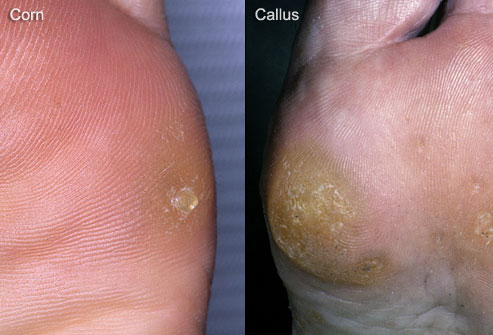
Foot Corn (aka Heloma) vs Callus
composite photo of corn and callus on foot Heloma Molle
  • Callus formation can be large and spread out. A corn is more pinpoint, small and hard.
  • Corns usually occur on the ball of the foot, under the first toe, the fifth toe and on top of the toes (especially if you have hammertoes). A callus usually occurs in the forefoot, but is usually very spread out.
  • Both can occur together- it is necessary to take the callus down then pop out the corn.

Corn vs. wart

Plantar+Wart+picture+2 Heloma Molle
Warts have little red dot’s due blood vessels, corns and calluses do not.

  • Skin lines go through a callus, whereas if you have a wart, the skin lines go around the wart.
  • A wart can display little red “dots” that are blood vessel growth into the wart. The callus should not have any red “dots”.

What causes a heloma molle?
  • Wearing loose, old or poorly stitched shoes.
  • If you ever have to really tighten your laces to get a snug fit.
  • High heels that can cause pressure or friction.
  • High arched feet form calluses under the first toe, fifth toe and under the heel.
  • Flat foot is the primary cause of increased pressure in areas of the foot, especially everywhere in the forefoot and inside part of the big toe and heel heel.
  • Rubbing in of the tops of the toes against a tight shoe is also a leading cause of corn formation in the toes.
  • The main cause: all types of biomechanical or foot deformities.

Home treatment guide

There are two + one steps to keep foot corn pain away. You have to get rid of them and then take measures to keep them away!

1) Stop them from appearing. 

2) Removing the actual corn.

3) Foot corn removal surgery

Please visit this link to learn more about heloma molle and its treatment.

Friday 28 June 2013

Do you suffer from psoriasis under the toenails?

Psoriasis under the toenails can result in severe thickening, discoloration and pitting of the toenails. Learn how to make your toenails better!

arth7 psoriasis Psoriasis Under The Toenails
Psoriasis under the toenails and fingernails

Causes of psoriasis under the toenails

The cause of toenail psoriasis is unknown. What we do know is that a good percentage of people suffering from psoriasis also develop nail problems as well. The reports vary with some saying only about 10-15% suffer from them, but other studies claim much higher numbers. The average seems to be around the 25% range.
You are more likely to have psoriasis under your toenails if:

Symptoms of psoriasis under the toenails:

Toenail psoriasis displays the following symptoms:
  • A discoloration beneath the nail. It is described as an “oil spot”.
  • The nail is much more thick.
  • The nail is extremely rough.
  • The nail displays characteristic pitting.
  • The distal part of the nail appears abnormal.
  • Beau’s lines – these are horizontal ridges.
  • Callus formation under the nail.
  • Loosening of the nail.

Diagnosis of psoriasis under the toenails:

The toenails are graded by a system known as the Nail Psoriasis Severity Index (NAPSI). It is a numberical and reproducible system for monitoring the toenail psoriasis. The system is based on assigning numerical values for some of the symptoms listed above.

Home treatment for psoriasis under the toenails:

Some quick tips for home care:
  • Keep your nails short and smooth. They are susceptible to bacterial and fungal infections which could make them look much worse.
  • Wear gloves to protect your nails while you are performing activities to keep your nails protected.
  • Wear properly fitted shoes to avoid excess pressure on your nails. Even light irritation and inflammation can make things worse.
  • Make sure to dry your nails properly after bathing.
  • Nail psoriasis is hard to treat, as nails grow very slowly. Be careful with them! They only grow 1mm per month.
  • You can try topical steroid cream temporarily to improve nail appearance.
  • Taking Vitamin D Vitamins may help.
  • Moisturizing ointments at night before bed work well.
  • Soak nails in vegetable oil while watching TV. You can then use an emery board or nail file to take the nails down a little bit.
  • Synthetic nail hardeners can make the nails look much better. These are glossy covers, no one will know the difference!
  • Acrylic nails are dangerous because you are more susceptible for nail fungus already with your psoriasis- I don’t recommend these.
  • Salicylic ointment can work great for your psoriatic nails. Follow directions of your prescriptions.
  • A mutlivitamin- while not completely proven through medical trials, has been recommended by many specialists.

Podiatrist treatment

There are many advances that are occuring in this field, so get excited! The outlook for psoriasis, while still dim is looking better and better every year.
Treatments focus on managing symptoms with a rheumatologist. Individualized plans can included topical and intralesional creams and injections. You can combine these with systemic and combination oral medication therapies.

For more information about psoriasis under the toenails visit this link.

Do you experience the toe nail coming off the nail bed?

The most common causes of the big toe nail coming off the nail bed is due to a traumatic injury, light rubbing of the toenail within your shoe that you never even noticed, a very severe fungal infection or in some cases we may never know the reason it fell off. The nail will almost always grow back and you shouldn’t get too worried as it is usually something that can be treated or corrected if you follow the treatment guide below. The nail usually appears discolored because it is filling up with blood underneath the nail as it is separating from the skin underneath it. Once the separation has began it is a normal process and at this point there are a few things that you can do to limit more pain or injury.
 Toe nail Coming Off The Nail Bed? This is what to do!

Trauma is the number one cause of nail loss
First confirm that you have actually experienced trauma, this is usually pretty evident because you stubbed your toe really hard or dropped something really heavy onto your toe. You will experience the following symptoms:
  • Pain
  • Bleeding under the nail bed leading to red streaks or discoloration under the nail.
  • Eventual loosening of the nail from the nail bed as the blood fills under the nail and you are able to evaluate the damage.

If you suspect another cause:
  • Fungal infection causing separation - The nails would have been thick, hard and discolored yellow or orange for a period of time before the nail separated. This is a very common and treatable cause of nail separation.
  • Jogger’s Toe - If you spend alot of time on your feet and you think it may have been possible that your toenail has been pressuring up against the front of your shoe then this is highly possible. This results in blistering under the toenail leading to the detachment of the nail- with or without pain!
Home treatment for the toe nail coming off the nail bed
The priority in this situation is to accept that the nail has been lost and that you will need to wait until you can grow out a new nail.
  1. Accept that the nail is gone and you will have to wait for it to grow back 1 millimeter per month or so. This means 6-9 months if the entire toenail has fallen off (the fingernails grow back a little bit faster). Unfortunately there is not too much that can be done to speed up the growth of the nail beyond leading a healthy lifestyle and getting lots of exercise and sun(basically anything that boosts your metabolism).
  2. If the toe is really painful – apply ice for 15-20 mins until it starts to get numb. Take some anti-inflammatory medication like ibuprofen or aspirin to prevent long lasting pain. Initially elevate the foot to decrease the pain as well. Once the pain is low enough you will be able to start trimming the nail down.
  3. The nail should be trimmed back as far as it is still attached, the danger here is that if you hit the nail again it will bend back and rip out with the tissue attached to it. OUCH! Avoid this serious and painful complication by trimming back early.
  4. If you cannot get to all the blood underneath the nail out and it is not painful then it is ok to let it just grow out over the next 6-9 months, but if it is really painful over a period of time then you should go to the podiatrist to get the blood drained(pain is due to pressure under the nail).
  5. Use a nail file, emery board or pumice stone to smooth out the remainder of the nail after it has been trimmed back so that it doesn’t get caught on your socks.
  6. Apply some antibiotic ointment- neosporin and triple antibiotic ointment work very well here. Use some water to wash out the bloody area and apply the antibiotic ointment and then cover it with a band-aid.
  7. If you are going to continue running or working on that foot put some heavy duty duct tape or athletic tape over the band-aid
  8. If the toe is getting red hot and swollen, you experience nausea, fever or redness moving up the toe or throbbing pain that lasts past the icing, anti-inflammatory medication and elevation then you likely have an infection. Get yourself to a podiatrist or a emergency room as soon as possible.
  9. Unless you damaged the nail matrix(the base of the nail) then it should grow back every time. The long term problems may be that the nail does not look exactly as it once did. It may curve more or be thicker- it is essential a scar of the nail bed. There are ways to treat it at this point. check out our guide on how to handle long nails.
Home prevention
  • Treat your fungal nails or joggers toe as outlined above.
  • Get fitted for for your proper shoe size
  • Trim your toenails straight across
  • Get proper socks
  • Use athletic tape or duct tape to cover the nail
To learn more about the toe nail coming off the nail bed, please visit this link. 

Tuesday 25 June 2013

Do you have red spot under toenail?

Red spot under toenail – this is usually caused by bleeding under the toenail, even if not painful! Learn what to do about it right here!

 Red Spot Under Toenail

Causes of red under the toenail:

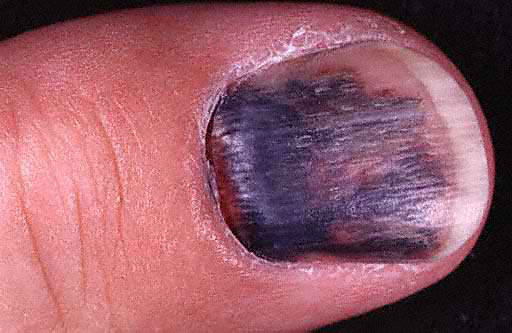
Red under the toenail is more commonly known as a subungual hematoma. This is nothing more than a buildup of blood underneath the toenail or the fingernail. The downward constant pressure of wearing shoes or a traumatic injury can cause the vessels under the nail to rupture and bleed.  The blood then pools underneath the nail plate. This can sometimes lead to pain, but the majority of the time there is not severe pain.

Most common in runners and joggers:

The most common cause is in runners or joggers. Thus this injury is sometimes called runner’s or jogger’s toe.  This is due to poorly fitting shoes and not enough space underneath the front of the shoe.
  • Poorly fitted shoes.
  • Not enough space in the front of the toenail.
  • Morton’s foot – short 1st toe puts pressure on the 2nd toe.

56 subungual hematoma 10 Red Spot Under Toenail

Diagnosis of red under the toenail:

  • It can look black, red or even brown.
  • It can be painful or not hurt at all.
  • If it does hurt, the pain is a throbbing type.
  • It can be small or take up the entire nail.
  • There can be a large traumatic incident before the spot appears.
  • There can be a history of new shoes being worn.
  • There can be a history of new exercise or job being started recently.
  • Running or jogging.
  • Slamming toe or fingernail.

Consider 4 other causes to black toenails:


Home treatment of red under the toenail:

If you are feeling extreme throbbing try the 5 following things:

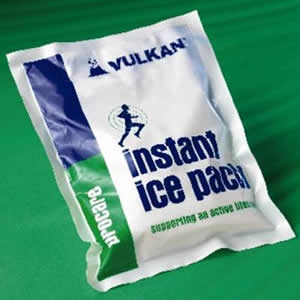
1) Ice the toenail!

The first step is to take some ice and apply it to the jammed toenail to decrease the inflammation in the area.
instant ice pack Red Spot Under Toenail
  • This will help decrease the immediate pain.
  • This will also help decrease the healing time over the next few days.
  • It will increase the odds of your toenail not falling off.

2) Put some pressure on it.

acebandage Red Spot Under Toenail
  • Wrap it to stop the Toe From Swelling.
  • Don’t make it too tight.
  • You still want to feel the toe.


3) Anti-inflammatory medication.

If you are healthy enough(with podiatrist or pharmacist), it is a good idea to take some anti-inflammatory medications. These will help decrease the swelling and the pain.
 Red Spot Under Toenail
  • Decreases the pain.
  • Increases the healing time.
  • Increases chances of keeping the nail.

4) If it is still hurting - go see a podiatrist to have the blood drained.

The podiatrist can drill through your toenail and drain the blood out the bottom if the pain is still hurting. This is considered the ultimate treatment!

5) Prevention is the best medicine!

footmeasure Red Spot Under Toenail
  • Get your shoes fitted properly.
  • Try a Brannock Device
  • Measure the arch length, foot length and the foot width.
  • Cut your toenails properly.
  • Don’t leave the toenails too long.

To learn more about red spot under the toenail visit this link.